Fast oven cleaning methods that pass landlord inspections
If you are moving out, the oven has a habit of becoming the one job that suddenly matters most. You can have the skirting boards gleaming and the bathroom sparkling, but if the oven still has burnt-on grease, that is often the bit landlords notice first. This guide to Fast oven cleaning methods that pass landlord inspections is built for that exact situation: fast, realistic, and good enough to meet the standards most landlords or letting agents expect at check-out.
Truth be told, the goal is not just "clean-ish". It is clean enough to look maintained, smell fresh, and avoid awkward deductions. That means focusing on the right method for the level of dirt, knowing what to leave soaking, and understanding where people usually go wrong. You do not need a weekend ruined by scrubbing. You do need a plan that works.
Below, you will find a practical, inspection-minded approach, from quick wins to stronger methods for stubborn oven grime, plus a checklist you can actually use the night before handover. Handy, yes. A bit boring? Maybe. But boring is exactly what you want when the deposit is on the line.
Why Fast oven cleaning methods that pass landlord inspections Matters
An oven can make or break the first impression at check-out because it is one of those appliances where dirt feels personal. Grease on the glass says "not finished". Burnt crumbs in the base say "rushed". A smoky smell says "we had one last roast dinner and forgot about it". Landlords and inventory clerks tend to spot ovens quickly because they are easy to compare against the condition recorded at move-in.
For tenants, this matters for three reasons. First, oven cleaning takes longer than people expect, especially if there is old carbon build-up. Second, the difference between a pass and a complaint is often visual rather than technical. Third, inspection day arrives whether you are ready or not. That is why a fast but methodical approach beats a last-minute panic clean every time.
In our experience, the people who do best are not necessarily the ones with the fanciest products. They are the ones who clean in the right order: racks first, then oven cavity, then door, then seals and knobs. Simple. But it works.
If you are already dealing with a full end-of-tenancy clear-out, oven cleaning fits into the broader picture of getting the property back to handover standard. A proper end of tenancy cleaning approach usually saves time because the oven is tackled alongside the rest of the kitchen rather than left as a separate headache. And if the whole property needs a deeper reset, a deep cleaning mindset is often the difference between a decent job and an inspection-ready one.
How Fast oven cleaning methods that pass landlord inspections Works
The basic idea is straightforward: loosen grease, lift residue, wipe away the waste, then repeat only where needed. The trick is choosing a method that matches the level of soil. If the oven has light splatter, a mild degreasing routine may be enough. If it has baked-on grease and dark patches, you will need more dwell time and a bit more pressure. No magic. Just chemistry, patience, and a cloth that you are prepared to sacrifice.
Most quick oven cleaning methods rely on one or more of these actions:
- Degreasing to break down fat and cooking oils
- Softening by leaving product in contact with the dirt for a set period
- Gentle abrasion using a non-scratch pad or soft scraper
- Heat-assisted loosening with a warm, not hot, oven surface
- Final polishing to remove smears and leave a cleaner finish
What makes a method landlord-friendly is not just that it is clean. It is that it looks clean under light. Oven glass, side racks, the top edge of the cavity, and the seal all matter because these are the places people check first. If those are sorted, the whole oven reads as cared for, even if it is not showroom perfect.
The key is consistency. A half-cleaned oven can look worse than one that was left alone, because the remaining patches stand out. So if you start, finish properly. That little bit of extra effort saves a lot of awkwardness later. It really does.
Key Benefits and Practical Advantages
There is a reason tenants search for fast oven cleaning methods in a hurry. A good process gives you control when time is tight and energy is low. You also avoid paying for unnecessary remedial cleaning, which can be annoying when you are already budgeting for movers, van hire, and the endless little costs of leaving a flat.
- Faster handover readiness: You can clean the oven in stages instead of losing an entire day.
- Better visual finish: Clean glass, clean racks, and no greasy smell make a big difference.
- Lower risk of deposit disputes: A well-cleaned oven reduces the chance of a cleaning deduction argument.
- Less physical strain: Using the right method means less aggressive scrubbing and fewer sore wrists.
- More predictable results: You know what will come off quickly and what needs soaking time.
There is also a psychological benefit, if we are being honest. Once the oven is done, the rest of the move-out clean usually feels less daunting. You can nearly hear the job shrinking in your head. One less thing on the list, and that matters on a stressful moving day.
For many households, pairing oven work with other kitchen tasks such as oven cleaning and a full cleaning company service can be a smart choice when the deadline is tight. A professional oven cleaner can also make sense if the oven is heavily neglected, because the job often takes longer than people expect.
Who This Is For and When It Makes Sense
This guide is for tenants, flat-sharers, landlords preparing a turnover, and anyone who needs the oven to look presentable fast. It is especially useful if your tenancy ends tomorrow, if you have already packed most of the kitchen, or if the oven has only moderate to heavy grease but not complete carbonisation.
It also makes sense when you are trying to decide between doing it yourself and booking help. A quick self-clean is practical when the oven is still in decent shape and you just need to remove recent splatter, fingerprints, and the usual baked-on edges. If the oven has years of accumulation, a strong odour, or thick black residue around the fan cover and door glass, then a professional service may be the better call.
To be fair, not everyone has the same standard of "clean enough". Some landlords are relaxed if the oven is fresh and free from obvious grease. Others expect a near-new finish. The safest assumption is that the property should look like it has been professionally cared for, even if it has not. That is the bar most people quietly work to.
This approach is also useful if you are moving within London or the wider commuter belt and juggling multiple handover tasks. For example, someone leaving a flat in London may be managing a same-week removal and final inventory, which leaves very little room for trial and error. That is exactly when a structured method helps.
Step-by-Step Guidance
Below is a fast, practical process that aims for good results without wasting time. Read it once, gather your supplies, then work through it in order. Do not bounce around between steps if you can help it. That is how oven cleaning turns into an all-evening saga.
1. Switch off and cool the oven properly
Never clean a hot oven with chemicals or wet cloths. Let it cool fully. If it is just warm, that can sometimes help loosen grime, but it should never be hot enough to make you flinch when touching the interior. Safety first, common sense second, panic nowhere near the room.
2. Remove racks, trays, and loose parts
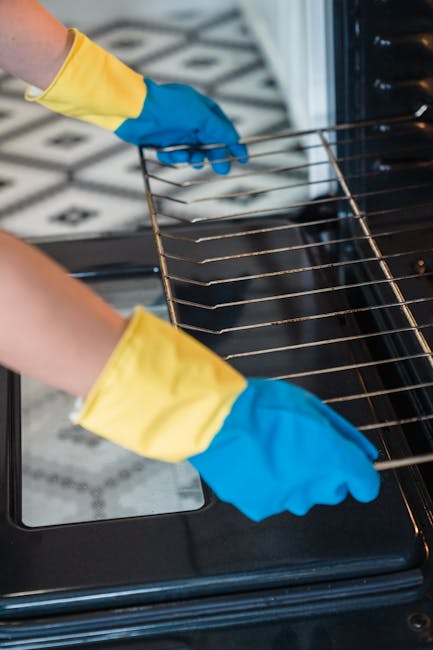
Take out racks, shelf supports, trays, and any removable bits you can safely clean separately. This gives you access to the full cavity and makes the main job much faster. Soak these parts in warm water with a degreasing cleaner while you work on the oven interior.
3. Pre-treat heavy grease spots
Apply a degreasing paste or spray to the greasiest areas: the bottom, the door glass, the area around the fan, and the top interior. Let it sit for the recommended dwell time. This step does the heavy lifting, and skipping it is usually why people end up scrubbing for ages.
4. Clean the racks separately
Racks are often the most annoying part, but they are also straightforward. After soaking, wipe away softened residue with a sponge or cloth. For stubborn patches, use a non-scratch pad. If they are still filthy, repeat the soak rather than forcing it with something abrasive that could damage the finish.
5. Wipe the oven cavity from top to bottom
Use a damp cloth to remove the loosened grime. Work from top surfaces down so dirty liquid does not run over places you have already cleaned. It is a bit old-fashioned, but it saves time. Pay attention to corners, the oven roof, and the edges where grease likes to hide.
6. Clean the oven door glass carefully
The glass is the inspection magnet. Use a cleaner suitable for oven glass and avoid metal scouring pads. If needed, repeat a second pass rather than pressing harder. A small amount of remaining haze is usually less visible than smear marks left by over-enthusiastic wiping.
7. Wipe seals, controls, and handles
The rubber seal, knobs, and handle are easy to forget. They should be wiped with a lightly damp cloth and mild cleaner. Avoid soaking seals, because that can cause wear. A clean handle makes the whole oven look better, oddly enough. People notice these little things.
8. Dry and polish the surfaces
Finish with a dry microfibre cloth. This removes streaks, improves the shine, and stops water marks. If the kitchen is chilly and the light is coming in from one side, you will spot smears quickly. Use that to your advantage. A final polish is often the difference between okay and inspection-ready.
9. Refit everything and do a final check
Put shelves and trays back once they are dry. Open the oven, step back, and check it under normal room light. If you can still see obvious patches, do a quick second pass. Better now than with the landlord standing in the doorway, clipboard in hand, saying nothing helpful.
Quick rule: if it is sticky, soften it first; if it is smeary, wipe and dry it; if it is burnt on, repeat the soak instead of attacking it harder.
Expert Tips for Better Results
A few small decisions can save a lot of effort. The first one is to work in sections rather than trying to clean the whole oven in one rush. That keeps the product from drying out before it has done its job. The second is to use the right cloths. Microfibre cloths are better than old tea towels because they pick up residue instead of pushing it around.
Another useful tip is to tackle the oven right after the hob and extractor are done. The kitchen then reads as a single clean space rather than a collection of nearly-clean bits. That broad impression matters more than people think. Landlords and agents do not always inspect each item in isolation; they notice the overall standard.
If you are dealing with a fairly grim oven, do not try to solve everything in one heroic burst. Give the product time to work, do something else, then come back. While the racks soak, clean the fridge seals, wipe cupboard doors, or sort your rubbish bags. The oven job often feels easier when it is not the only thing happening.
One small but useful thing: use decent lighting. Open the oven door near a window or switch on the kitchen light fully. Grease and smears show up fast in bright light, which is exactly what you want before the inspection. Annoying in the moment, useful in the long run.
If you are unsure whether your chosen method is enough, compare the result to the rest of the kitchen. Does the oven look like it belongs in a properly cleaned home, or does it still scream "left to the last minute"? That honest little question usually tells you what to do next.
Common Mistakes to Avoid
Most oven cleaning mistakes come from rushing, using the wrong products, or expecting instant results. Here are the ones that most often cause trouble during inspections.
- Cleaning a hot oven: This is unsafe and can bake product onto the surface.
- Using abrasive pads on glass: They can leave scratches that look worse than the dirt.
- Ignoring the seals and edges: These places often collect grease and fail the "quick glance" test.
- Wiping before letting product dwell: You end up spreading grime instead of lifting it.
- Leaving streaks on the glass: Smears catch the light and look untidy even if the dirt is gone.
- Forgetting the oven smell: A clean-looking oven that still smells smoky may not feel properly cleaned.
Another common error is over-cleaning with too much liquid. This can drip into places it should not, especially around electrics or control panels. Use damp, not soaked, cloths unless the manufacturer's guidance says otherwise.
And yes, many people also skip the final check because they are tired. Very understandable. But that last two-minute inspection is worth it. It catches the tiny things that usually cause the irritation later.
Tools, Resources and Recommendations
You do not need a huge kit for a landlord-ready oven clean, but the right basics help. If you have them ready before you start, the whole job moves faster.
| Item | Why it helps | Best use |
|---|---|---|
| Degreaser or oven-safe cleaner | Breaks down grease and burnt residue | Heavy soil, glass, cavity walls |
| Microfibre cloths | Lift residue and reduce streaks | Final wipe and polishing |
| Non-scratch sponge | Helps with softened grime | Racks, door edges, interior |
| Plastic scraper | Removes stubborn patches safely | Burnt spots on glass or cavity |
| Warm water and bowl | Useful for soaking and rinsing | Racks and loose parts |
| Rubber gloves | Protects hands from cleaner and hot water | Any full oven clean |
If your oven is especially grim, it may be worth considering professional help rather than fighting with it for hours. That is especially true if you are also booking other services such as one-off cleaning or broader oven cleaning support as part of a larger moving-out plan.
If the rest of the property needs attention too, useful related services can include domestic cleaning, window cleaning, and carpet cleaning. The point is not to buy more than you need. It is to choose the right level of help for the time you actually have.
Law, Compliance, Standards, or Best Practice
For UK rentals, the practical standard is usually based on tenancy agreement terms, inventory condition, and reasonable cleanliness expectations at handover. There is not one universal "oven must be cleaned to this exact threshold" rule that applies everywhere. In practice, the oven should be returned in the condition expected by the tenancy agreement and the check-in inventory, allowing for fair wear and tear.
That means the safest approach is to follow the condition record if one exists and leave the appliance clean, odour-free, and free from visible grease or food residue. If you are unsure how strict the landlord or agent will be, assume they will inspect the obvious surfaces first: the door glass, interior cavity, shelves, handles, and seals. That is usually where disputes start.
From a safety point of view, always check appliance instructions if you are using stronger products. Avoid mixing chemicals, keep ventilation open, and never use anything that could damage coatings, fans, seals, or controls. If the oven seems faulty, dirty around the electrics, or difficult to handle safely, it is better to stop and seek professional support.
Best practice also means documenting what you have done. A couple of photos before and after can be useful if there is ever a conversation about cleaning standards. Nothing dramatic. Just a sensible record. It helps, and it takes thirty seconds.
Options, Methods, or Comparison Table
There are a few practical ways to get an oven inspection-ready. The best choice depends on how dirty it is, how much time you have, and whether you are trying to do the whole property at once. Here is a simple comparison.
| Method | Speed | Effort | Best for | Watch out for |
|---|---|---|---|---|
| Quick degreaser wipe-down | Fast | Low to moderate | Light soil, recent splashes | Not enough for heavy carbon build-up |
| Soak-and-wipe deep clean | Moderate | Moderate | Average end-of-tenancy ovens | Needs dwell time and a second pass |
| Heavy-duty manual scrub | Slower | High | Old grease and burnt residue | Can be tiring if you rush it |
| Professional oven cleaning | Fast for you | Low | Severely dirty ovens or short deadlines | Extra cost, but often less hassle |
For many tenants, the soak-and-wipe approach is the sweet spot. It is quick enough to fit into a moving schedule, but thorough enough to satisfy most inspections if the oven is not in terrible condition. If the oven is really bad, a professional finish can be the calm, sensible choice rather than a heroic DIY effort that ends with sore arms and poor results.
Case Study or Real-World Example
Imagine a one-bed flat where the tenant has already packed most of the kitchen and is leaving the next morning. The oven has the usual mix of grease, a few burnt bits on the base, and cloudy streaks on the glass. Not disastrous, but definitely not passable as-is.
The quickest effective routine in that situation would be:
- Remove the racks and soak them immediately
- Apply cleaner to the glass and greasy interior areas
- Clean everything else while the product sits
- Return to the oven after the dwell time and wipe thoroughly
- Dry and polish the door glass last
What matters in that example is timing. The oven is not treated as a separate all-day project. It is worked into the wider moving-out clean, so nothing dries out, nothing gets forgotten, and the final result looks intentional. That is usually what landlords respond to: not perfection, but clear evidence that the property has been properly looked after.
There is a small but important lesson here. The oven does not have to be spotless like it has never seen a lasagne. It does need to be fresh, presentable, and free from obvious grime. That is a realistic target, and one most tenants can reach with the right method.
Practical Checklist
Use this checklist before your inspection or handover. It keeps the job focused and stops you from missing the annoying little details.
- Oven switched off and fully cooled
- Racks, trays, and shelf supports removed
- Heavy grease pre-treated and left to dwell
- Oven cavity wiped from top to bottom
- Door glass cleaned and streak-free
- Seals, knobs, and handle wiped down
- No visible crumbs, burnt patches, or greasy residue
- All parts dry before refitting
- Final light and smell check completed
- Kitchen surfaces nearby also wiped for a tidy overall impression
Expert summary: the fastest oven clean that passes a landlord inspection is usually not the hardest-scrubbing one. It is the one that uses soak time well, focuses on visible surfaces, and finishes with a dry, clean polish. Simple, but very effective.
If you are already planning other move-out tasks, it can help to bundle them with a broader service such as pricing and quotes planning so you can compare what is worth doing yourself and what is better outsourced. And if you need local support, a service page like end of tenancy cleaning in Westminster can be relevant for busy central London moves.
Conclusion
Fast oven cleaning methods that pass landlord inspections are really about working smart: loosen the grease, clean in the right order, and finish with a careful visual check. That approach saves time, reduces stress, and gives you a much better chance of handing back the property without a cleaning argument hanging over you.
If the oven is only moderately dirty, a structured DIY clean is often enough. If it is heavily soiled, or you are short on time, professional help may be the better route. Either way, the aim is the same: an oven that looks cared for, smells fresh, and does not become the thing everyone remembers at check-out. And honestly, that is a nice thing to get off your plate.
Get a free quote today and see how much you can save.
When the last drawer is empty and the kettle is gone, there is something quietly satisfying about seeing the oven gleam back at you. One less worry. One more step done well.
Frequently Asked Questions
How do I clean an oven fast before a landlord inspection?
Start by removing the racks, apply a suitable oven cleaner to greasy areas, let it sit, then wipe from top to bottom. Finish with the door glass and a dry cloth so it looks clean under light. The key is to let the product do the work rather than scrubbing too soon.
What oven cleaning method is most likely to pass a check-out inspection?
The best option is usually a soak-and-wipe method with careful attention to the glass, racks, seals, and corners. It gives a good balance of speed and finish. If the oven is heavily burnt-on, a professional clean may be more reliable.
Can I use baking soda and vinegar on a rental oven?
Yes, for light grease it can help, but it is not always strong enough for heavy end-of-tenancy grime. It is better viewed as a mild cleaning aid than a guaranteed inspection-level solution. For stubborn residue, a proper degreaser usually works better.
How long does a landlord-ready oven clean usually take?
For a lightly used oven, it may take under an hour including drying time. For a dirtier oven, allow longer because soaking and repeat wiping are often necessary. A very neglected oven can take much more time, and sometimes that is the point where booking help makes sense.
What parts of the oven do landlords usually inspect?
They usually look at the oven door glass, cavity walls, racks, trays, seals, handles, and any visible grease around the fan or edges. The smell can matter too. If the oven looks fresh and free from residue in those areas, it generally presents well.
Is it better to clean the oven myself or hire someone?
If the oven is in decent condition and you have time, DIY is fine. If it is very dirty, you are moving out quickly, or you want a more polished result, a professional service can be the calmer option. Be honest about the condition, because that usually decides it for you.
Will a landlord charge me if the oven is not spotless?
That depends on the tenancy agreement, inventory, and the condition expected at handover. Minor traces of use may be acceptable, but obvious grease, burnt deposits, or bad smells can trigger a complaint. A reasonably clean oven is always safer than leaving it to chance.
What should I avoid when cleaning an oven quickly?
Avoid cleaning a hot oven, using abrasive pads on glass, and mixing cleaning chemicals. Also avoid rushing the dwell time, because that usually leads to more scrubbing later. Fast does not mean careless.
Can I clean oven racks in the bath?
You can, but only if the bath surface is protected and the cleaner is suitable. Many people prefer a bucket, sink, or large tray because it is simpler and less messy. To be fair, whichever method you choose, soaking the racks first makes the rest of the job much easier.
How do I stop the oven smelling after cleaning?
Wipe away all cleaner residue, dry the interior fully, and leave the door open for a while if it is safe to do so. Any leftover cleaner or moisture can cause a lingering smell. A fresh-smelling oven usually just needs a proper final wipe and a bit of air.
What is the quickest way to make an oven look presentable?
Focus on the glass, the visible grease spots, and the handles first. Even if the whole interior is not perfect, a clean front and tidy cavity can make a big visual difference. That is often enough to calm an inspection, which is what most people really want.
Do I need professional oven cleaning for end of tenancy?
Not always. If the oven is relatively clean and you are methodical, you can often handle it yourself. If there is heavy carbon build-up, strong burnt odour, or very little time before handover, professional help is worth considering.
What is the biggest mistake tenants make with oven cleaning?
The biggest mistake is leaving it too late and then trying to rush a difficult job. Second place goes to using the wrong products or skipping the final polish. A careful, time-aware approach usually gets a much better result, even if the oven started out looking a bit sorry for itself.