DIY stain removal for carpets without professional products
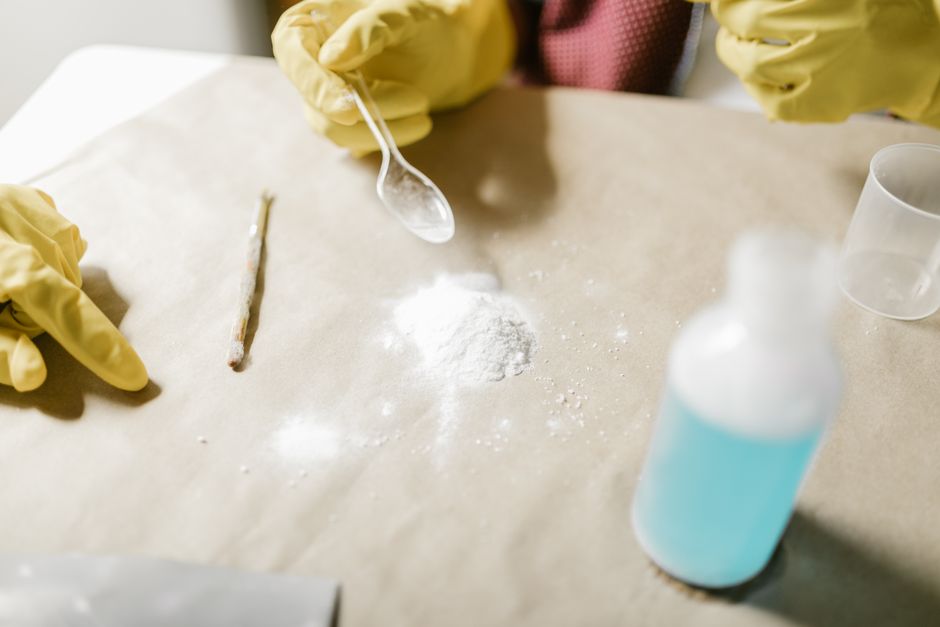
Spills happen at the worst possible moment. Tea on a pale carpet, muddy footprints after a wet London afternoon, or a dropped plate of pasta that lands with an awful little splash. If you need DIY stain removal for carpets without professional products, the good news is that many stains can be tackled with simple household items and a bit of patience. You do not always need a specialist spray to get decent results.
This guide walks you through what works, what can go wrong, and how to clean carpet stains safely without making the mark spread or sink deeper. We will keep it practical, honest, and easy to follow. And yes, a few stains are stubborn little beasts - but plenty are fixable if you act quickly and use the right method.
- Why DIY stain removal for carpets without professional products matters
- How DIY stain removal for carpets without professional products works
- Key benefits and practical advantages
- Who this is for and when it makes sense
- Step-by-step guidance
- Expert tips for better results
- Common mistakes to avoid
- Tools, resources and recommendations
- Law, compliance, standards, or best practice
- Options, methods, or comparison table
- Case study or real-world example
- Practical checklist
- Conclusion
- Frequently asked questions
Why DIY stain removal for carpets without professional products Matters
Carpets are forgiving in some ways and brutally honest in others. They will hide light dust for a while, but they will also show a coffee drip or wine splash exactly where your eye keeps landing. Acting quickly matters because fresh stains sit on the fibres first, then slowly travel downward into the backing. Once that happens, they become much harder to lift.
For many households, DIY stain removal for carpets without professional products is the sensible first response. It can reduce damage before a stain sets, buy time before a deeper clean, and help you avoid buying a cupboard full of products for one small accident. In rented homes, that can also matter at the end of a tenancy, when visible marks may affect how the property presents. If you are preparing a larger clean, it can help to think of stain treatment as part of the wider carpet care routine, alongside services like carpet cleaning or a fuller deep cleaning approach when the carpet needs more than spot treatment.
There is another reason this topic matters: many people over-clean a stain. They scrub, soak, and panic, then the patch becomes bigger than the original spill. Truth be told, that is one of the most common carpet cleaning mistakes. A calm method usually works better than a heroic one.
Key takeaway: Blot first, test first, and use the mildest method that has a realistic chance of working. That simple discipline saves a surprising amount of carpet.
How DIY stain removal for carpets without professional products Works
The basic idea is straightforward. Most stains can be reduced by loosening the residue, lifting it from the fibres, and absorbing it before it spreads. Different stains behave differently, though, so the method needs to match the mess. Water-based spills, oily marks, food stains, and tannin stains all respond a bit differently.
When you use DIY stain removal for carpets without professional products, you are usually relying on a few principles:
- Blotting: lifting liquid out without pushing it deeper.
- Dilution: weakening the stain so it is easier to remove.
- Absorption: using cloths or paper to draw moisture out of the pile.
- Gentle chemistry: using mild household ingredients that are less likely to damage carpet fibres.
- Controlled contact time: letting a solution sit briefly, but not long enough to soak the underlay.
That balance is important. Too little moisture and the stain stays put. Too much, and you create a damp patch that can smell musty or distort the backing. In a flat where heating is on and windows are closed, a wet patch can hang around longer than you expect, especially in winter. A carpet should look treated, not drenched. Simple as that.
Also worth noting: carpets are not all the same. Wool, synthetic fibre, and blended pile can react differently to vinegar, detergent, or heat. If you are not sure what yours is made from, start with the gentlest possible method and always test in a hidden spot.
Key Benefits and Practical Advantages
The biggest benefit is obvious: you can often save a carpet before a stain becomes permanent. But there are a few other practical advantages that people underestimate.
- Lower cost: you can often use items already in the kitchen cupboard.
- Fast response: you do not have to wait for a booked appointment.
- More control: you decide how much moisture and pressure to use.
- Useful for small accidents: minor spills usually do not need heavy-duty treatment.
- Better day-to-day upkeep: learning a few methods helps you deal with future spills more confidently.
There is also a very real peace-of-mind benefit. You know that feeling when a cup tips and everyone pauses for half a second? Having a method ready cuts the panic down. That is worth a lot in itself. Especially if you have children, pets, or a housemate who "did not see the glass there," which, fair enough, happens more than people admit.
DIY methods are also useful as a first stage before calling in help. If a stain is partly reduced at home, a professional clean may be more effective later. In some cases, homeowners and tenants use DIY stain removal first and then book broader services such as rug cleaning or upholstery cleaning for the surrounding soft furnishings so the room looks consistent again.
Who This Is For and When It Makes Sense
This approach is ideal if you are dealing with everyday spills and want a safe, sensible first response. It suits homeowners, tenants, landlords doing a quick inspection clean-up, and anyone trying to maintain a carpet between deeper cleans.
It makes sense when:
- the stain is fresh or only slightly set
- the mark is small to medium in size
- you want to avoid harsh chemicals
- you need a quick fix before guests arrive
- you are trying to protect the carpet before arranging a more thorough service
It is less suitable when the stain is old, widespread, or caused by something that may require specialist treatment, such as dye transfer, bleach damage, or heavy grease. At that point, DIY can still help, but expectations need to be realistic. To be fair, not every mark is a quick win. If the carpet fibres themselves are damaged or discoloured, cleaning may only improve the appearance rather than restore it fully.
This is also a good fit for people who prefer a gentler cleaning routine. Some households avoid strong fragrances or industrial products, and others simply do not want to store lots of chemicals under the sink. Fair enough. A more minimal toolkit can still do a lot.
Step-by-Step Guidance
Here is the safest general method for common spills. This is not a one-size-fits-all miracle, but it is a reliable starting point.
1. Act quickly, but do not rush blindly
Grab a clean white cloth or paper towels. The white part matters more than people think because coloured cloths can transfer dye onto a damp carpet. Blot the spill from the outside in. Do not rub. Rubbing spreads the stain and mats the fibres down, which makes the carpet look worse even after the stain is gone.
2. Lift solids carefully
If the spill includes food, mud, or anything chunky, remove the excess first with a spoon or blunt edge. Work gently. You are lifting debris, not scraping paint off a fence. If you press too hard, the stain gets pushed lower into the pile.
3. Test a mild solution in a hidden area
Before applying anything to the stain, test the solution on a corner, under a sofa, or behind a door. Wait a few minutes and check for colour change or fibre damage. This is especially important on wool carpets and dyed fibres.
4. Use a simple cleaning solution
For many everyday stains, a small amount of lukewarm water mixed with a little mild washing-up liquid is enough. Apply it sparingly to a cloth rather than pouring it directly on the carpet. Press the cloth onto the stain, then blot again with a dry cloth.
For some stains, diluted white vinegar can help break down residue and odour. Use it carefully and never mix it with bleach or other cleaning chemicals. The smell may be a bit sharp at first, but it fades as the carpet dries.
5. Work from the edge inward
This stops the mark spreading. It is a small detail, but it matters. One of the easiest ways to make a stain look larger is to scrub at the centre and send dirty moisture outward.
6. Repeat gently
Blot, pause, repeat. Keep replacing dirty cloth sections with clean ones. If the cloth is already stained, it is not helping anymore. You will notice the colour transfer gets lighter as the stain lifts. That is the point where patience pays off.
7. Rinse lightly and blot dry
Once the stain has faded, use a cloth dampened with clean water to remove any leftover soap or vinegar. Then blot with dry towels until the area feels only slightly damp. If possible, open a window or run a fan to speed drying. A damp carpet left alone can smell a bit stale by evening. Nobody wants that.
8. Fluff the fibres once dry
When the area is fully dry, gently lift the pile with your fingers or a soft brush. This helps the cleaned section blend in with the rest of the carpet.
| Stain type | Best first response | What to avoid |
|---|---|---|
| Tea or coffee | Blot, then use mild detergent solution | Hot water straight away if the stain contains milk or sugar residue |
| Red wine | Blot fast, then use cool water and gentle detergent | Rubbing, soaking, or heavy scrubbing |
| Mud | Let it dry slightly, then vacuum and blot remaining residue | Scraping while fully wet |
| Grease or oil | Absorb first with dry material, then use a mild detergent | Flooding with water too early |
| Pet accidents | Blot, clean gently, then dry thoroughly | Using heat before the smell is gone |
Expert Tips for Better Results
A few small habits can make a large difference. These are the kind of details that separate a decent result from a "well, that was a bit disappointing" result.
- Always blot with white towels: you can actually see what is being lifted.
- Use less liquid than you think: more is not better here.
- Work in daylight if possible: stains are easier to judge near a window than under a yellow lamp at 9 p.m.
- Keep the carpet dry between passes: give the fibres a moment before reapplying solution.
- Think in layers: a stain may need several gentle rounds rather than one aggressive attempt.
For greasy spills, a tiny amount of absorbent powder like bicarbonate of soda can help draw out residue before you apply liquid. Let it sit, vacuum it up thoroughly, and then move on. For pet messes, odour matters as much as appearance. If the smell remains after cleaning, the area may need a second treatment rather than a stronger chemical. Sometimes the nose notices what the eye misses.
One more thing: if you are unsure whether a stain is organic, oily, or dye-based, start gentle. In carpet care, restraint is often the smarter skill. Not very dramatic, I know. But true.
Common Mistakes to Avoid
A lot of carpet damage happens during the cleaning attempt, not from the original spill. That sounds annoying because it is. Still, it is fixable if you know the traps.
- Scrubbing hard: this frays fibres and spreads the stain.
- Using bleach: it can permanently strip colour and weaken carpet material.
- Soaking the area: excess moisture can reach the underlay and cause odour or staining beneath the surface.
- Skipping a patch test: this is how colour loss catches people out.
- Using heat too early: heat can set some stains, especially protein-based ones.
- Mixing cleaning products: never combine unknown household chemicals just to "make it stronger." That is a bad idea, full stop.
Another mistake is assuming every stain should be treated the same way. A coffee spill is not the same as paint, and a sauce stain is not the same as grease. If you cannot identify the stain, start with dry blotting and cool water before trying anything else. Better to go slowly than to lock the mark in place.
Tools, Resources and Recommendations
You do not need much to get started, which is part of the appeal. A sensible home kit usually includes:
- clean white microfibre cloths
- paper towels
- a soft brush or old toothbrush
- a spoon or blunt scraper
- mild washing-up liquid
- white vinegar
- bicarbonate of soda
- a small bowl
- cold or lukewarm water
- a vacuum cleaner
If the stain is larger than a hand-sized patch, or if you are dealing with a room that needs broader attention, a general carpet care approach may be more efficient than repeated spot cleaning. In those cases, a professional carpet cleaner can be useful, especially if the stain has settled into a high-traffic area near an entrance or hallway.
If the carpet is part of a whole-property refresh, you might also look at one-off cleaning for a larger reset. That can make sense after a party, move-out, or a long stretch of neglect. Sometimes the best resource is not a product, but a plan.
Law, Compliance, Standards, or Best Practice
For most homeowners, DIY stain removal is a practical housekeeping task rather than a regulated activity. Even so, best practice matters, particularly if you are cleaning a rented property or handling stains in a workplace setting. In the UK, landlords and tenants commonly care about the condition the carpet is left in at the end of a tenancy, and using sensible methods helps avoid avoidable disputes. The exact expectations depend on the tenancy, the age of the carpet, and normal wear and tear, so it is wise to keep your approach reasonable and well documented.
If you are cleaning in an office, shared building, or managed property, basic health and safety habits still apply. Keep walkways dry, ventilate the area, and avoid mixing products. If a chemical is used, follow the instructions carefully. That is ordinary common sense, but it matters more than people think.
For service-based cleaning businesses, insurance, safe handling, and clear complaints procedures are part of a good professional standard. If you are comparing options or thinking about outsourcing a larger clean, pages like insurance and safety, health and safety policy, and complaints procedure show the sort of documentation a trustworthy company should make available. It is not about overcomplicating things; it is about knowing that the basics are being taken seriously.
One final practical note: if a stain involves bodily fluids, mould, or anything that raises hygiene concerns, treat it cautiously and consider whether a more thorough cleaning approach is better. There is no prize for being brave with the wrong stain.
Options, Methods, or Comparison Table
Different home methods suit different kinds of stains. Here is a simple comparison to help you choose the least risky starting point.
| Method | Best for | Pros | Limitations |
|---|---|---|---|
| Mild washing-up liquid and water | Food, drink, general spills | Easy, cheap, widely available | May struggle with old or oily stains |
| White vinegar solution | Odours, some tannin stains, general fresh marks | Useful, simple, low-cost | Not ideal for every fibre type or stain |
| Bicarbonate of soda | Odour, mild moisture, light grease support | Good absorber, easy to vacuum | Needs time and careful removal |
| Cold water blotting | Fresh liquid spills | Safest starting point | May not remove the residue fully on its own |
| Professional cleaning later | Set-in, large, or repeated stains | More thorough, better for difficult cases | Costs more and may need booking |
If you are choosing between methods, ask yourself one simple question: is this a surface spill or a stain that has already settled? That answer usually tells you whether a gentle home method is enough or whether you need a deeper approach. No need to get fancy about it.
Case Study or Real-World Example
A fairly typical situation: someone drops a mug of tea in a living room around 8:30 on a weekday evening. The spill hits a cream carpet near the sofa, which is always where these things land, somehow. The first reaction is panic, then a flurry of kitchen roll, then a bit of rubbing. Not ideal, but common.
In a better version of that same scene, the spill is blotted immediately with a white cloth. A small amount of diluted washing-up liquid is dabbed onto the mark, not poured. The area is worked gently from the outside in, then rinsed with clean water and blotted dry. By the time the kettle has boiled again, most of the stain has faded to a faint shadow.
What made the difference? Timing, restraint, and drying. The carpet was not scrubbed, and it was not saturated. The result was not magical, just sensible. And that is often how real stain removal works. Not dramatic. Just careful.
If the stain had remained visible, the next step might have been a fuller room clean or a targeted carpet service, especially if the stain sat in a high-traffic area. That is where a broader cleaning plan comes in handy, particularly in homes that also need domestic cleaning support or periodic cleaning company help for larger upkeep jobs.
Practical Checklist
Use this quick checklist before and during stain treatment. It keeps the process calm, which is half the battle.
- Identify the stain if you can
- Blot immediately with a clean white cloth
- Lift solids before adding liquid
- Test any solution on a hidden patch
- Use the mildest method first
- Work from the outside of the stain inward
- Avoid soaking the carpet
- Replace cloths as they get dirty
- Rinse lightly to remove residue
- Dry thoroughly with towels and air flow
- Check for lingering odour or shadowing once dry
Quick summary: if you remember nothing else, remember this - blot, test, treat gently, dry well. That sequence fixes more carpet problems than most people expect.
Conclusion
DIY stain removal for carpets without professional products is not about making every stain disappear perfectly. It is about giving yourself the best chance of saving the carpet with simple, safe steps before the stain becomes a bigger issue. A careful approach usually works better than a harsh one, and a bit of speed goes a long way.
For fresh spills, the home methods in this guide can be more than enough. For older marks, mixed stains, or damage that has gone into the fibres, the smartest move may be to stop, assess, and bring in more help. That is not failure. It is just good judgement.
And honestly, once you have handled one awkward stain without panic, the next one feels less like a disaster and more like a nuisance. Which is life, really.
Get a free quote today and see how much you can save.
Frequently Asked Questions
Can I remove carpet stains without using specialist carpet products?
Yes, many fresh stains can be treated with simple household items like mild washing-up liquid, white vinegar, bicarbonate of soda, and clean water. The key is to blot quickly and avoid scrubbing.
What is the safest first step for any carpet stain?
Blot the stain with a clean white cloth or paper towel as soon as possible. That removes surface liquid before it spreads deeper into the pile.
Should I use hot water on carpet stains?
Not straight away. Hot water can set certain stains, especially protein-based ones such as food or bodily fluids. Lukewarm or cool water is usually the safer starting point.
Is vinegar safe for all carpet types?
Not always. Vinegar can help with some stains, but it should be patch-tested first. Wool and some dyed carpets may react badly, so always test in a hidden area.
What stains are hardest to remove at home?
Old stains, dye transfer, bleach marks, grease that has soaked in, and stains that have been scrubbed hard are often the toughest. They may improve, but not always disappear completely.
Why does my stain keep coming back after drying?
That usually means residue is still trapped in the fibres or backing. Moisture can pull the stain back to the surface as it dries, so a second gentle treatment may be needed.
Can I use baking soda on carpet stains?
Yes, bicarbonate of soda can help absorb moisture and reduce odours. It is especially useful with damp stains or light grease, but it still needs to be vacuumed out thoroughly.
How do I stop a stain spreading while cleaning?
Work from the outside edge toward the centre, use only a small amount of liquid, and blot rather than rub. That keeps the stained area from growing.
When should I give up on DIY and get help?
If the stain is large, old, odorous, or changing the carpet colour rather than just sitting on top of it, it may be time for a more thorough professional clean. Sometimes that is the cleaner, cheaper choice in the end.
Will DIY cleaning damage my carpet?
It can if you use the wrong product, oversoak the fibres, or scrub too hard. Gentle methods, patch testing, and proper drying reduce that risk a lot.
How long should a carpet take to dry after spot cleaning?
Drying time depends on the amount of liquid used, ventilation, and room temperature. A lightly treated area should usually dry much faster than a soaked one, especially if you use towels and open a window.
Is DIY stain removal enough for end of tenancy cleaning?
For small fresh stains, often yes. But if the carpet has several marks or older damage, DIY may only be part of the answer. In that case, a broader clean or a targeted carpet service may be needed to get the best overall result.
What should I do if the stain has a smell but looks clean?
That often means residue is still present below the surface. Clean the area again gently, dry it thoroughly, and if the smell persists, consider a deeper clean. Odour is usually a clue that the job is not quite finished.